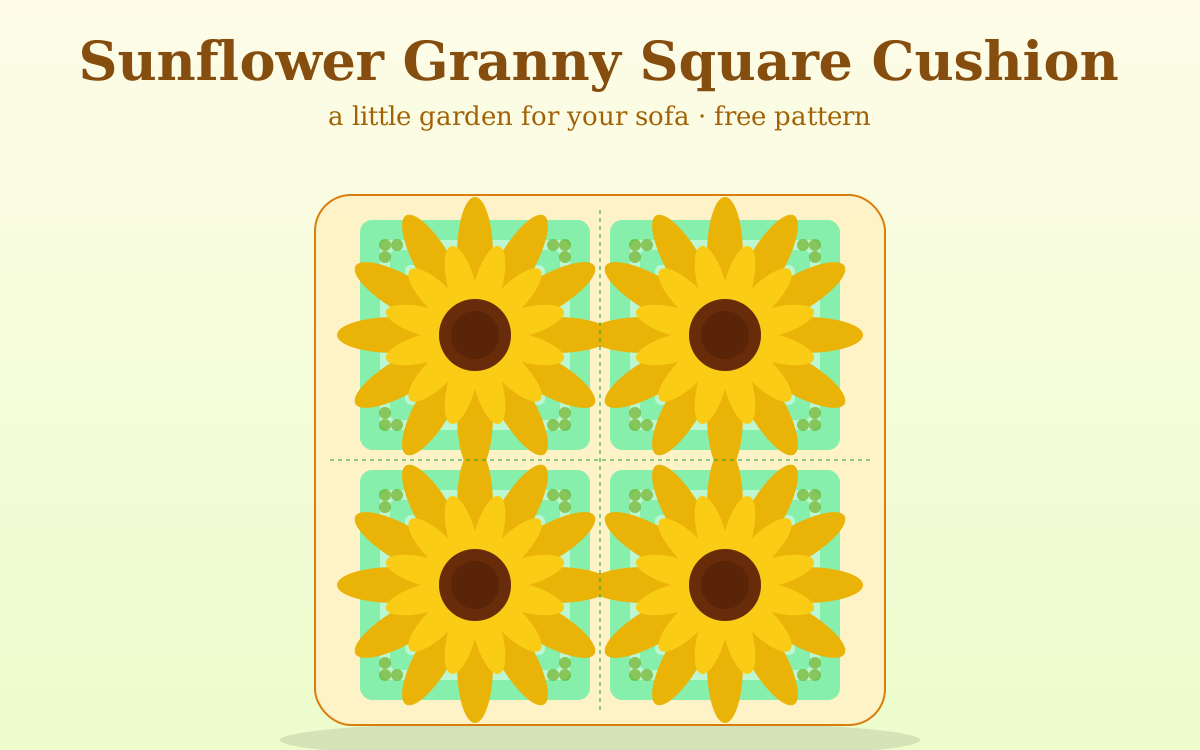
There is a moment in late summer when the sunflowers in the garden stand taller than you, their great golden faces turned toward the light with a kind of absolute confidence — as if they have never once doubted that the sun will always come back. That feeling: warm, golden, full of easy happiness, is exactly what this pattern is trying to hold onto. Each granny square in this cushion cover is a single sunflower, blooming outward from a rich dark-chocolate centre, through rings of bright butter-yellow petals, into a calm sage-green border. Put four of them together, and you have something that genuinely looks like a little garden on your sofa — and that you made yourself, with your own two hands and a small hook.
The traditional granny square is one of the great inventions of crochet. It's a self-contained little world: a few rounds of chain spaces and dc clusters that builds outward into a perfect square. This sunflower version adds a petal round that transforms the humble square into something magical — and once you've made one, you'll want to make twenty.
What you'll need
- 🌻 DK (weight 3) cotton or soft acrylic yarn in three colours:
- Chocolate Brown — 30g
- Golden Yellow — 80g
- Sage Green — 130g
- 🪝 4mm crochet hook
- A 40cm × 40cm cushion pad
- Stitch markers, yarn needle, scissors
Finished size
Each granny square measures approximately 18cm × 18cm. Four squares joined in a 2×2 arrangement give you a cushion front of approximately 36cm × 36cm — perfect for a standard 40cm cushion pad with a slight gather.
Skill level
Beginner–Intermediate. You need chain, slip stitch, single crochet, double crochet, and confidence working in rounds. The petal round is new but the instructions are detailed — you'll get it on the second or third try at most.
Abbreviations
- ch — chain
- sl st — slip stitch
- sc — single crochet
- dc — double crochet
- tr — treble crochet (yarn over twice)
- dtr — double treble crochet (yarn over three times)
- sp — space
- MR — magic ring
- () — work all stitches inside brackets into the same stitch or space
The Sunflower Granny Square — make 4
Round 1 — The centre (Chocolate Brown):
Make a magic ring. Ch 2 (does not count as a stitch). Work 12 sc into the ring. Pull the ring closed firmly. Sl st to the first sc to join. (12 sc). Fasten off, leaving a short tail.
Round 2 — Inner petals (Golden Yellow):
Join Golden Yellow in any sc. * (Ch 2, tr, tr, ch 2, sl st) in the same stitch — this creates one small petal. Sl st into the next sc. * Repeat from * to * in every sc around. (12 small petals). Do not fasten off yet.
Round 3 — Outer petals (Golden Yellow):
You will now work behind the Round 2 petals, inserting your hook directly into the Round 1 sc stitches (between the bases of the petals). * (Ch 3, dtr, dtr, ch 3, sl st) in the same Round 1 sc stitch. Sl st into the next Round 1 sc. * Repeat around. (12 longer outer petals, lying behind the inner layer). Fasten off Golden Yellow.
Tip: Hold the inner petals forward with your thumb as you work behind them. It feels awkward at first — do a couple, then it becomes easy and deeply satisfying.
Round 4 — First border (Sage Green):
Join Sage Green from the back of the work, inserting your hook into any Round 1 sc (again, working behind all the petals). Ch 3 (counts as first dc). Working behind the petals throughout: dc in next 2 sc, * ch 2, dc in next 3 sc *. Repeat around, adjusting so that you place a ch-2 corner at every 3rd stitch to form a square shape — you'll have 3 groups of 3 dc on each side with a ch-2 space at each corner. Sl st to the top of starting ch-3. (Hint: this round shapes the sunflower into a square — the ch-2 corners are what makes it a granny square rather than a circle. Take your time on this round.)
Round 5 — First granny round (Sage Green):
Sl st to the corner ch-2 sp. Ch 3, 2 dc in same sp, ch 2, 3 dc in same sp (corner made). * Ch 1, 3 dc in next ch-sp (this is a side cluster), ch 1, (3 dc, ch 2, 3 dc) in corner ch-2 sp. * Repeat from * to * around all 4 corners. Sl st to top of ch-3. Fasten off and weave in ends.
Round 6 — Second granny round (Sage Green):
Join Sage Green in any corner sp. Repeat the structure of Round 5, adding one extra 3dc cluster to each side. You should have 2 clusters on each side after this round. Sl st to join. Fasten off.
Joining the 4 squares
Lay the four completed squares out in a 2×2 grid with right sides facing up. Thread a length of Sage Green onto your yarn needle and use a whipstitch through the back loops only of each corresponding stitch along the joining edge. Pull each stitch firmly but not tightly. When all four squares are joined into a 2×2 panel, press the joins flat with a slightly damp cloth.
Cushion back
The simplest option: work a plain rectangle of Sage Green double crochet, the same dimensions as your front panel. Or cut a piece of coordinating fabric (thick cotton or felt works beautifully) and stitch it to the back with a needle and thread.
Assembly
Place the front and back panels right sides together (or wrong sides together if you prefer visible seams on the outside — both look lovely). Join three sides together with a row of sc through both layers. Insert the cushion pad. Sc the final side closed, or crochet a row of button loops along one edge and sew on buttons for a removable cover.
"Making granny squares is like eating popcorn — you cannot stop at just one. I started this cushion meaning to make four squares and ended up making twenty-three. There are now sunflowers in every room of our house." — Micky
Micky's tips ✨
- The magic ring matters. Pull it very tight before joining Round 1 — a loose centre makes the whole flower look floppy. If you're struggling, chain 4 and sl st to form a ring instead.
- Gauge doesn't have to be perfect for a cushion cover — just make sure all 4 squares are the same size as each other. Block them before joining if they're slightly different.
- Keep your petal round stitches loose. The trebles and double trebles need a little room to bloom outward properly. If they look squashed, try going up a hook size for the petal round only.
- Cotton vs acrylic: Cotton gives a crisper, more structured look (great for home décor); acrylic is softer and squishier. Either works beautifully.
Pattern by Micky. Free to use for personal projects and gifts. 💜